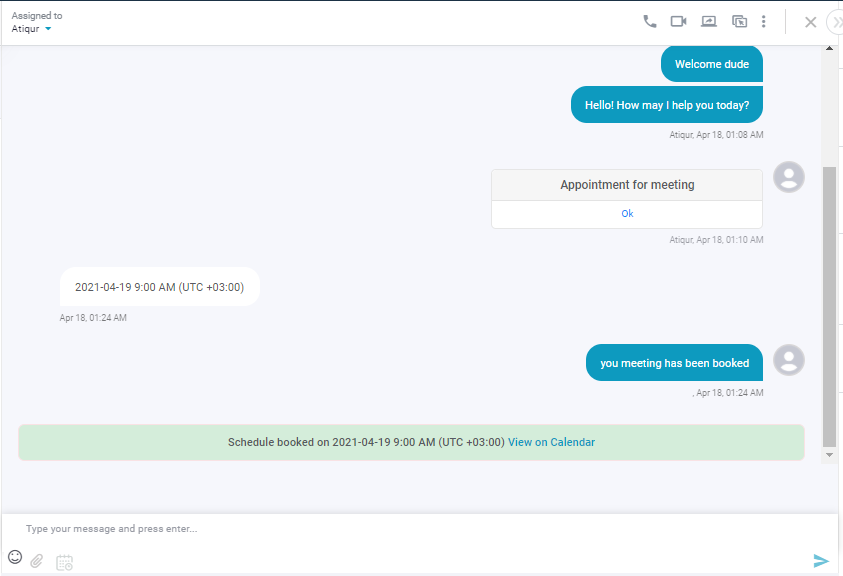
The Appointment feature makes scheduling any meetings a totally smooth and hassle-free experience for customers. The integration into the chat widget helps a business allow their customers to schedule instant meetings in chat messenger. This will help clients see exactly which appointments are available and thus can book them instantly.
The Appointment feature can add value in numerous ways:
In order to enable appointments successfully, you need to follow the below-mentioned steps.
1. Under REVE Chat dashboard -> go to Settings menu -> Click on General Settings -> then click on Appointment option.
2. Connect with your Google account (Gmail account).
3. After the connection is successful, the next step is ‘Appointment Settings’.
(i) Website live chat – Click on the box if you want to activate the Appointment feature on your website.
(ii) Chatbot – Click on the box if you want to activate the Appointment feature on your bot flow.
Note – If you want to activate at both places, you have to click on both boxes.
If you click only on the chatbot option, you will get the Appointment option as part of the actions under the bot builder section.
4. You need to follow the below fields to complete the Appointment module settings.
(i) Appointment module name – Specify your appointment by giving an appropriate name.
(ii) Meeting title – Define the purpose of the appointment by giving a suitable title.
(iii) Meeting location – Mention the location where the meeting is scheduled to happen.
(iv) Meeting timezone – Choose the right timezone for scheduling the meeting based on your business hours.
(v) Meeting description – A short description of the purpose of the meeting gives better clarity.
(vi) Meeting Duration – Select the duration of the meeting from the options given (15, 30, 45, 60 mins respectively).
(vii) Available day & time – Update your slot availability in terms of day and time for the whole week.
(viii) Confirmation message – Customize a thank you message for your visitors to view after the appointment is booked successfully.
(ix) Message to show when slots are not available – Communicate with your customers about the failure in booking meetings.
5. Click on ‘Save Changes’ once your settings are complete as per your requirements.
6. Now agents can send an Appointment link to the visitor from the chat window and the visitor will book an appointment.
7. When the agent sends the link to the visitor, he needs to click on the link first.
Then choose the preferable date.
Then choose the preferred time slot.
That’s all. Your Appointment is successfully booked!
8. Once the visitor confirms from his side, the agent gets notified.
